# Use frp+OpenConnect Server to build remote access intranet NAS service
# Preface
Frp is a common intranet penetration tool, which is used to expose the intranet service port on the public network for remote access to the intranet. This method is usually not very safe, and it is easy to be scanned by bad guys and cracked violently.
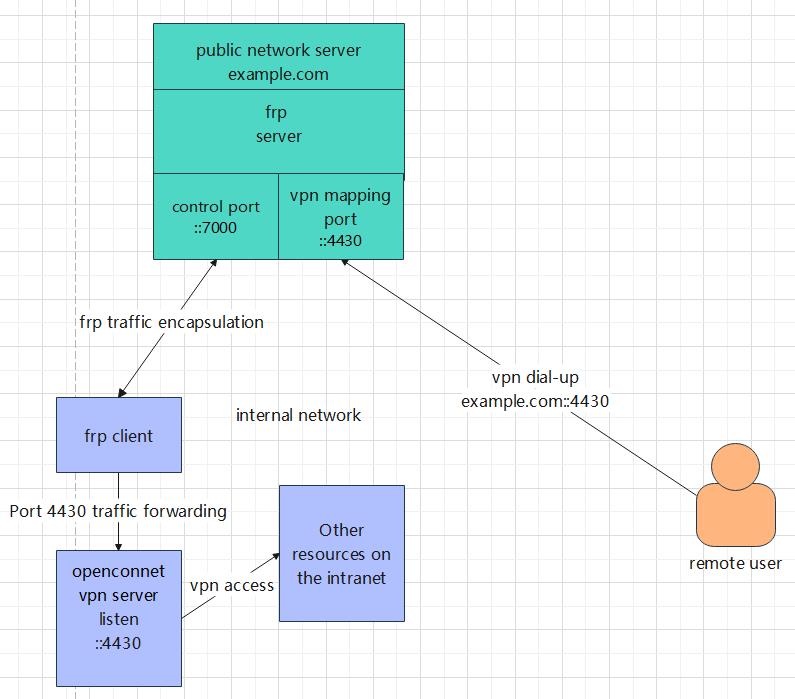
During the epidemic, through various tossings about remote access to my home NAS practice, I finally found that building a set of vpn services on the intranet, and then exposing the vpn service port to the public network through frp, can realize remote access to intranet NAS services safely.
The program has been running stably for 2 years now.
# Principles of network architecture
# Installation environment requirements
A public network linux server
Intranet Linux environment, install docker
# Configuration steps
# Public network server frp server configuration
Enter the public network server and download frp
Download address: https://github.com/fatedier/frp/releases (opens new window)
Select the current corresponding version, unzip and enter the frp directory, modify frps.ini to:
[common]
bind_port = 7000
#token, the longer the uuid, the better
token = 1234567890abcdefg!@#$%
Start the frps server
nohup ./frps -c ./frps.ini > /tmp/frps.log &
# Configure intranet server frp client
Enter the intranet server, download frp to the intranet server
Enter the frp directory after decompression, modify frpc.ini to:
[common]
server_addr = <public network server ip address>
server_port = 7000
#Same as the token of the server
token = 1234567890abcdefg!@#$%

#openconnect service udp port mapping
[vpnudp]
type = udp
local_ip = 127.0.0.1
local_port = 4430
remote_port = 4430

#openconnect service tcp port mapping
[vpntcp]
type = tcp
local_ip = 127.0.0.1
local_port = 4430
remote_port = 4430
Start the frp client
nohup ./frpc -c ./frpc.ini > /tmp/frpc.log &
If there is no problem /tmp/frpc.log will show:
login to server sucess
# Configure openconnect server
First install the docker environment
Installation Guide:
https://docs.docker.com/engine/install/
Pull the openconnect image
docker run --name ocserv --privileged -p 127.0.0.1:4430:443 -p 127.0.0.1:4430:443/udp -e SRV_CN=example.com -e SRV_ORG="exmple.com" -e SRV_DAYS=3650 -d --restart=always tommylau/ocserv
Clear the test account:
docker exec -it ocserv sh -c "echo '' > /etc/ocserv/ocpasswd"
Set the routing address to the internal network segment, so that after the dial-up is successful, only the traffic on this network segment will enter the VPN. For example, if your internal network address is the 192.168.3.0 network segment, you can set it as:
docker exec -it ocserv sh -c "echo \"route=192.168.3.0/255.255.255.0\" > /etc/ocserv/config-per-group/Route"
Enter the container and copy the ocserv.conf configuration in the container to the host
docker cp ocserv:/etc/ocserv/ocserv.conf ./
Edit the last 4 lines of ocserv.conf to read:
default-select-group = Route[vpn]
#select-group = All[Global Proxy All Proxy]
auto-select-group = false
config-per-group = /etc/ocserv/config-per-group
After saving, copy into the container:
docker cp ./ocserv.conf ocserv:/etc/ocserv/ocserv.conf
Restart the container:
docker restart ocserv
Add new user username:
docker exec -it ocserv ocpasswd -c /etc/ocserv/ocpasswd -g "Route" username
Enter the user password to complete the user creation.
# Dial up
After completing the above work, you can use the vpn client to dial up. Currently, the clients supported by openconnect vpn server are as follows:
Cisco AnyConnect,
OpenConnect GUI, download address Welcome to OpenConnect graphical client pages. | OpenConnect GUI (opens new window)
OpenConnect GUI configuration instructions:
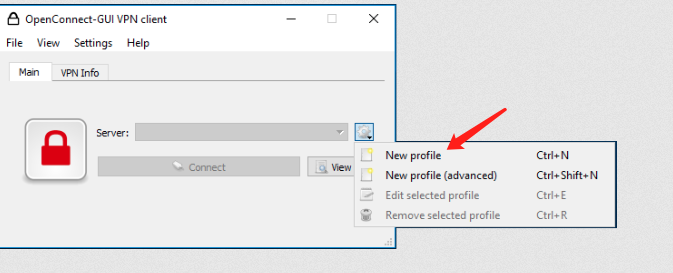
After downloading, install, start, and click New profile:
Name: Enter vpn
Gateway: Enter the ip address of your public network server such as: https://<ip>:4430
Username: Enter the vpn username you created
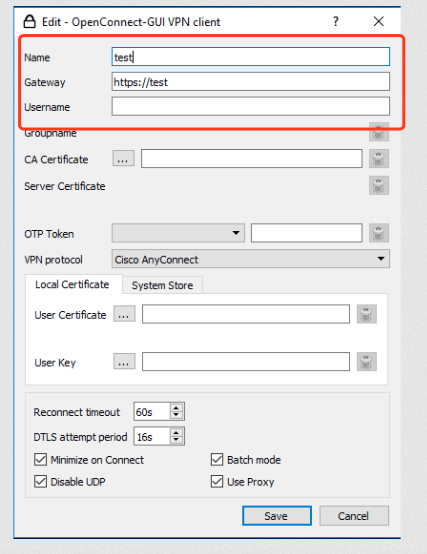
Click save when done
Click connect to start dialing
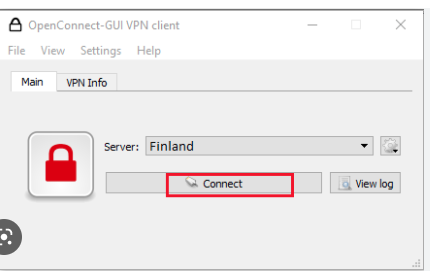
A password prompt pops up, enter the vpn user password
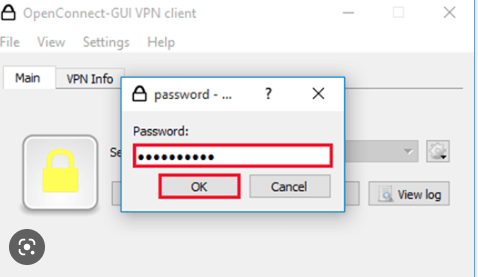
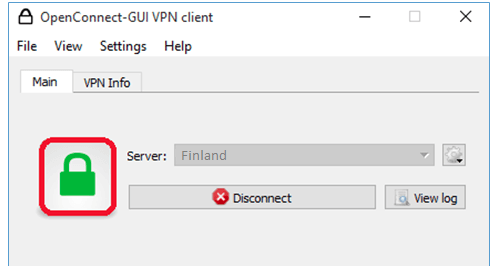
The green lock means the connection is successful
